Bottle warmers are essential tools for busy parents, especially when it comes to late-night feedings. They help to heat baby’s milk and formula to a comfortable temperature, ensuring your little one is satisfied and well-fed.
However, how to clean a bottle warmer can be somewhat of a mystery to many parents.
A clean bottle warmer not only prevents bacteria from building up but also ensures optimal performance and longevity. Taking the time to thoroughly clean and maintain your bottle warmer will go a long way in giving you peace of mind knowing that your baby’s bottles are being heated in a germ-free environment.
Key Takeaways
- Regular cleaning prevents bacteria buildup and maintains performance
- Understanding your bottle warmer’s parts helps simplify the cleaning process
- Maintenance plays a crucial role in the longevity and efficiency of your bottle warmer
Understanding a Bottle Warmer

As a new parent, I have realized the importance of having reliable baby gear for my newborn’s health and safety. One such essential item is a bottle warmer.
In this section, I will share my knowledge and experience in using a bottle warmer, specifically focusing on popular brands such as Philips Avent, Munchkin, and First Years Bottle Warmer.
A bottle warmer is a device designed to heat a baby’s milk or formula to an appropriate temperature. This is crucial for the baby’s health because it ensures consistent warmth throughout the feed, reducing the chances of any cold spots that can upset their tiny stomachs.
Moreover, using a bottle warmer makes feeding more convenient, especially during nighttime when I want to ensure that my baby gets their meal as quickly and as effortlessly as possible.
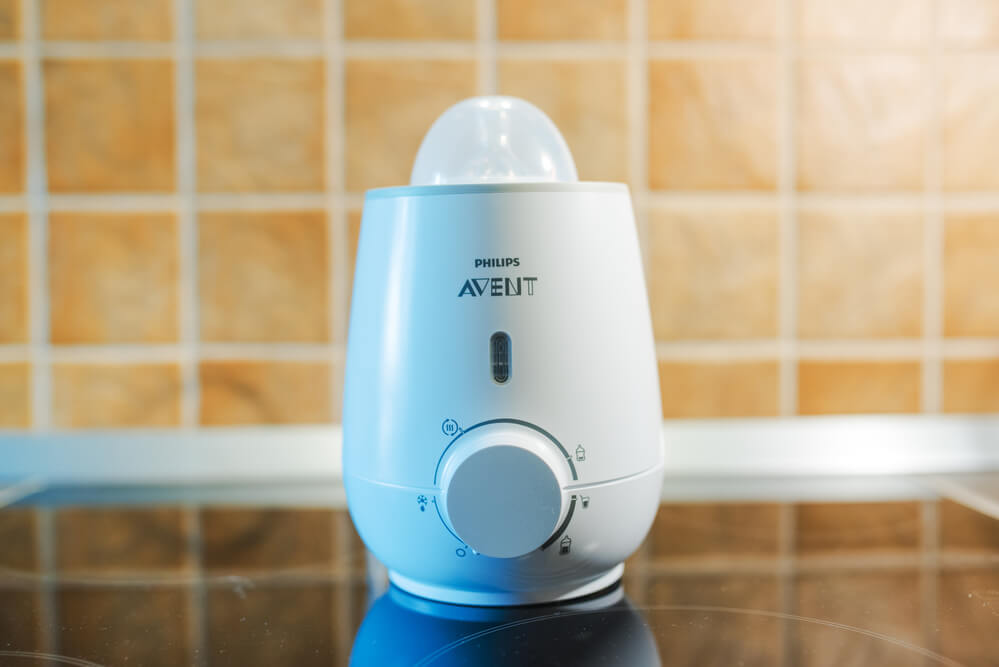
Two popular bottle warmers in the market are the Philips Avent and Munchkin. Both brands have specific features that cater to different parents’ preferences. For instance, the Philips Avent warmer allows for fast heating; it takes only three minutes to warm a 5 oz bottle to around 98.6°F (body temperature).
On the other hand, the Munchkin warmer has a built-in timer, adjustable temperature settings, and an auto shut-off function for safety.
When using the First Years bottle warmer, the added advantage is that it can accommodate wide-neck bottles and regular-sized baby food jars. It also has an adjustable heating feature that lets you control the warming time and temperature according to your baby’s needs.
To clean a bottle warmer, it is essential to follow the manufacturer’s instructions. Regular cleaning not only maintains the device’s longevity but also ensures that it stays free from bacteria and other germs.
For most bottle warmers, cleaning involves unplugging the device, letting it cool down, wiping the heating chamber with a damp cloth, and occasionally descaling with vinegar to remove mineral deposits.
In summary, a bottle warmer is an indispensable addition to my baby gear collection. By understanding its key features and how to maintain cleanliness, I can ensure that my baby receives their nourishment at an optimal temperature while maintaining their health and safety.
Importance of Cleaning a Bottle Warmer
I find it essential to clean a bottle warmer regularly, as it ensures the health and safety of my baby. Bacteria can quickly grow in warm, moist environments, and a dirty bottle warmer is the perfect breeding ground for them. By cleaning the bottle warmer, I am preventing the risk of harmful germs and bacteria from reaching my baby through milk or food warmed in it.
Descaling the bottle warmer plays a vital role in maintaining its efficiency and durability. When I descale my bottle warmer, I remove any mineral deposits that accumulate over time due to the use of tap water. These mineral deposits might affect the heating process, requiring more time to warm my baby’s milk or food.
Regular descaling ensures that the bottle warmer functions optimally, providing a safe and consistent heating temperature for my baby’s needs.
As a parent, I know that my baby’s health is of utmost importance. Keeping the bottle warmer and clean not only protects them against bacteria but also ensures that no harmful chemicals or toxins leach into their food.
A clean bottle warmer ensures the safety and quality of the milk or food I feed my baby, essential for their overall well-being and growth.
In conclusion, cleaning and descaling a bottle warmer are essential steps to safeguard my baby’s health and maintain the bottle warmer’s proper functioning. By doing so, I can ensure that my baby is always consuming safe, warm milk or food, contributing to their well-being.
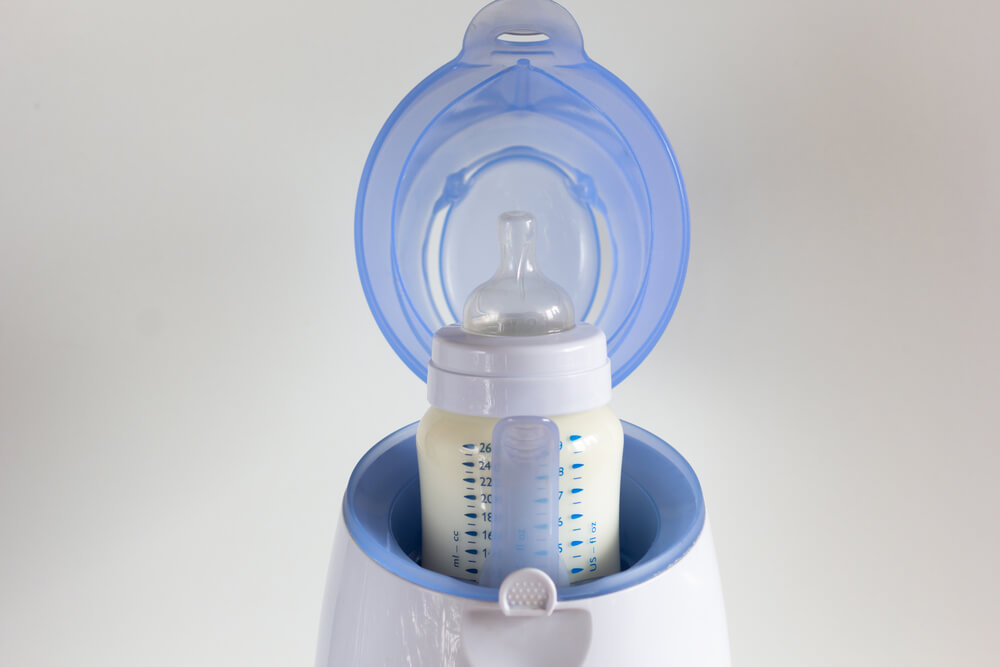
Identifying the Parts of a Bottle Warmer

Before diving into how to clean a bottle warmer, it’s essential for me to familiarize myself with its different components. Knowing each part will make the cleaning process more efficient and effective.
The removable parts of a bottle warmer are the items that I can take off or apart for cleaning. These typically include the warming basket, lid, and sometimes a removable water reservoir. It’s important to take note of these parts, as they will require thorough cleaning.
The reservoir is where I add water to the bottle warmer. It heats up and creates steam, which warms the baby’s bottle. Some bottle warmers come with a removable water reservoir, making it easier to clean and refill.
The lid is the cover that goes over the top of the bottle warmer. It helps keep the heat and steam contained, allowing the bottle to heat evenly and more quickly.
Inside the bottle warmer, there is a heating chamber. This is where I place the bottle for warming. Usually, there is a warming basket that holds the bottle inside the chamber. The warming basket is designed to elevate the bottle and allow steam to circulate around it for even heating.
At the base of the heating chamber, I will find the heating element. This is the part that heats up the water to create steam. It’s essential to avoid exposing the heating element to any unnecessary moisture or water, as it contains electrical components.
The electrical components are what power the bottle warmer. These parts should never come into contact with water or be submerged, as it can cause damage or create a safety hazard.
Now that I am familiar with the components of a bottle warmer, I can proceed to clean it effectively while ensuring the safety of the device and maintaining its performance.
Steps to Clean a Bottle Warmer
First, I unplugged the bottle warmer and let it cool down to ensure my safety while cleaning the appliance. Once it’s cooled down, I disassemble any removable parts, such as trays or baskets. This allows me to reach every surface that may have experienced buildup or residue.
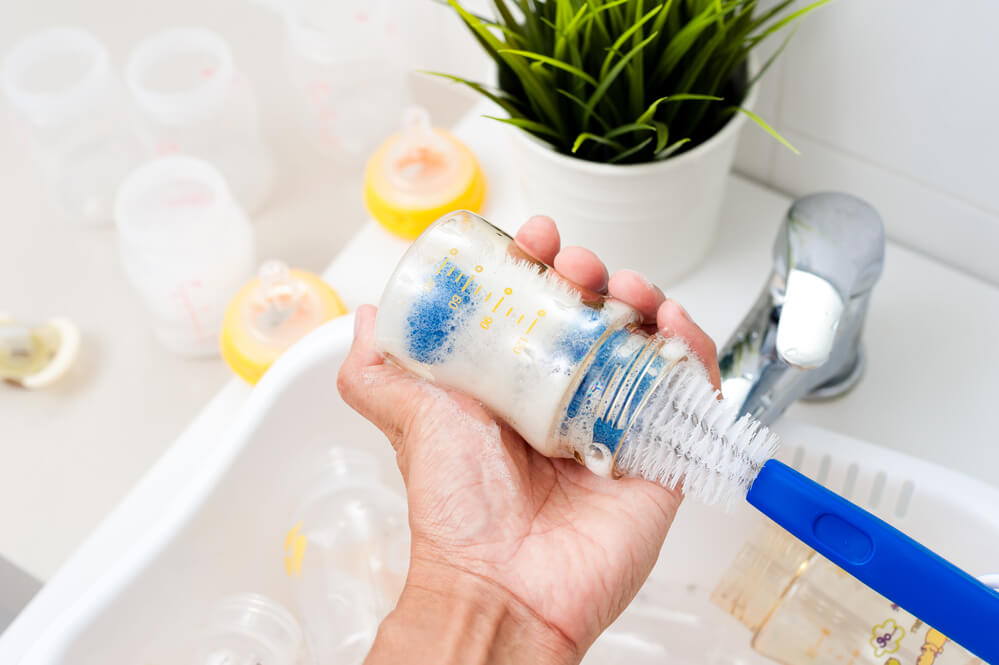
In the next step, I prepare a cleaning solution by mixing warm soapy water with a few drops of mild dish soap. Using a sponge or cloth, I carefully scrub the interior and exterior surfaces of the bottle warmer. It’s important to pay attention to any small crevices or nooks where bacteria may accumulate.
I rinse these surfaces thoroughly with clean water to ensure no soap residue is left behind.
To descale the bottle warmer, especially if there’s mineral buildup, I fill the reservoir with a mixture of equal parts water and white vinegar. I let this solution sit in the reservoir for around 30 minutes, or as specified by the manufacturer’s instructions.
After the recommended wait time, I follow any additional descaling steps outlined in the manual.
For any hard-to-reach areas or stubborn stains, I use a soft brush, rag, or towel to gently scrub those spots. It’s crucial to be gentle in this process to avoid damaging the appliance. I also take my time thoroughly rinsing with clean water, as any lingering vinegar or soap could affect the taste and safety of future bottles.
After cleaning and rinsing, I use a dry cloth or towel to wipe down the bottle warmer, ensuring it is completely dry before reassembling and storing it. Taking the time to properly clean and maintain the bottle warmer not only extends its lifespan but also ensures the safety and well-being of those who rely on the appliance for their nourishment.
Decaling and Removing Hard Deposits
I find that using white vinegar is an effective method for descaling and removing limescale deposits from a bottle warmer. It is essential to maintain a clean bottle warmer, as hard deposits formed from hard water can affect the performance and longevity of the device.
To start, I recommend filling the bottle warmer with equal parts white vinegar and distilled water. This mixture helps break down the limescale deposits and makes them easier to remove. Once the solution is in place, I let the bottle warmer run a normal warming cycle.
The vinegar reacts with the limescale, loosening the hard deposits and making it easier to wipe them away.
After the warming cycle has finished, I carefully pour out the vinegar solution. It’s essential to discard this solution and not use it for any other purpose, as it has been mixed with the deposits and can be harmful.
Next, I use a soft cloth or sponge to thoroughly scrub the interior of the bottle warmer, ensuring that I remove any remaining deposits. It’s crucial to be gentle during this process to avoid causing scratches or other damage to the bottle warmer.
Once all the deposits are removed, I rinse the bottle warmer with fresh distilled water to remove any lingering vinegar residue. Rinsing with distilled water rather than tap water helps prevent further buildup of minerals.
I usually run two to three rinses with distilled water to ensure that all traces of vinegar are gone.
To maintain a clean bottle warmer and minimize the need for frequent descaling, here are a few tips I follow:
- Use distilled water instead of tap water in the bottle warmer to avoid hard water deposits.
- Regularly wipe down the interior and exterior of the bottle warmer with a soft, damp cloth.
- Perform descaling and hard deposit removal as soon as I notice a buildup occurring, or incorporate it into a monthly cleaning routine.
Special Techniques and Precautions
I find it essential to take precautions while cleaning a bottle warmer to ensure its long-lasting performance and maintain hygiene. I would like to share some special techniques and precautionary measures that have helped me to clean my bottle warmer effectively.
First, it is vital to avoid using abrasive sponges or cleaners that can scratch or damage the interior parts of the bottle warmer. Instead, I prefer using a soft sponge or cloth with mild dish soap and water to gently yet thoroughly clean the surfaces.
When I encounter mineral deposits or hard water stains, I have found that white vinegar works best. I mix equal parts of white vinegar and tap water, fill the bottle warmer, and let it sit for about 15-30 minutes. Afterward, I thoroughly rinse and wipe the interior.
At times, I have noticed some lingering unpleasant odors in my bottle warmer. To address this issue, I use uncooked rice as a natural air freshener. I simply pour some uncooked rice inside the warmer, swirl it around, and let it sit for a few hours before vacuuming or shaking it out.
In terms of precautionary measures, I always unplug the bottle warmer when it is not in use or when I am cleaning it. This not only preserves energy but also ensures safety from electrical mishaps.
One thing I have learned is to never put the bottle warmer in a microwave, as it can damage the electrical components or even cause a fire hazard. Moreover, I am mindful of not submerging the entire apparatus in water, as doing so can also result in electrical malfunctions.
By following these techniques and precautions, I ensure that my bottle warmer remains in good working order, safe, and hygienic for daily use.
Cleaning the Reservoir, Lid, and Other Parts
To start the cleaning process, I first unplug my bottle warmer and let it cool down. I make sure to handle it cautiously to avoid getting burned.
For the water reservoir, I remove it from the main unit and pour out any remaining water. Using a mixture of mild dish soap and warm water, I gently scrub the inside of the reservoir with a bottle brush or a soft cloth. To rinse, I fill the reservoir with clean water, swish it around, and pour it out.
I repeat this process until the soapy water is gone.
For the lid and other removable parts, I take them off the bottle warmer. I then clean these components using the same mixture of mild dish soap and warm water. I scrub gently with a soft cloth to avoid any damage. After cleaning, I rinse them thoroughly with clean water.
For the main unit, I avoid submerging it in water to prevent any electrical damage. Instead, I wipe down the exterior with a soft, damp cloth and mild dish soap. I make sure to pay attention to the heating element and temperature control area.
Once all the parts are cleaned and rinsed, I place them on a clean towel to air dry. I ensure that they are completely dry before reassembling and using the bottle warmer again. By carefully cleaning and maintaining the reservoir, lid, and other parts, I ensure that my bottle warmer stays in top condition and continues to effectively warm up my baby’s bottles.
Drying and Maintenance
After cleaning your bottle warmer thoroughly, it is essential to let it air dry completely. I always make sure to wipe any excess water with a clean cloth, then place the bottle warmer on a dry, flat surface to air dry. This step will prevent any lingering moisture that could cause mold or unpleasant odors.
When it comes to maintenance, performing regular checks on your bottle warmer is crucial to ensure its longevity and functionality.
Based on my experience, I suggest checking the following components:
- Heating element: Inspect for any signs of wear or discoloration. If you notice any issues, it might be time to replace the part or get a new bottle warmer.
- Thermostat: Ensure it is functioning correctly and maintaining the desired temperature by testing with a thermometer.
- Power cord: Regularly check for any fraying, wear, or damage, as this could pose a potential safety hazard.
- Exterior parts: Keep an eye out for any cracks or damage to the plastic components.
As a rule of thumb, I also recommend to:
- Clean your bottle warmer after each use, following the manufacturer’s instructions to maintain optimum performance.
- Keep the device out of reach from children when not in use, as they might accidentally turn it on or damage the appliance.
- Ensure proper storage when not in use, keeping it in a cool, dry place to prevent any damage.
By implementing these drying and maintenance practices, I have found my bottle warmer to be a reliable and efficient appliance for my daily baby care needs.
Terms and Definitions
In this article, I will discuss the right way to clean a bottle warmer. As a parent, I understand the importance of maintaining a hygienic environment for my baby, and that includes ensuring that their food and milk are properly warmed and free from bacteria.
A bottle warmer is a device specifically designed to heat up baby food, milk, or formula quickly and evenly. It can effortlessly warm up food jars and baby milk bottles. A typical bottle warmer comprises a warming chamber filled with steam or water, which helps achieve the desired temperature for the baby’s food.
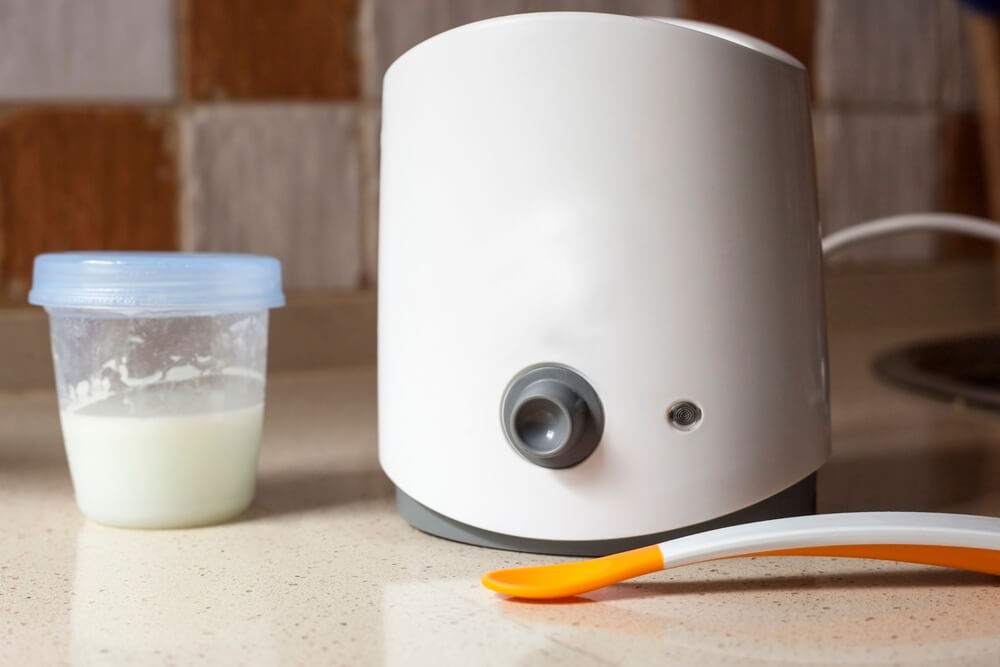
Throughout the daily use of a bottle warmer, formula residue, milk residue, and, sometimes, food particles accumulate inside the warming chamber and the steam vents. The residue, if not cleaned regularly, may lead to bacterial growth or cause unpleasant lingering odors.
This is why it is crucial for every parent to know how to effectively clean a bottle warmer.
For parents who use bottle warmers, it is important to keep the user manual handy. The manual often contains specific instructions and guidelines on cleaning and maintenance, as every model is designed differently.
As a parent, I make sure to follow the manual and strictly adhere to the manufacturer’s guidelines.
To provide a better understanding and make the bottle warmer cleaning process easier, here are some key terms and definitions:
- Food: Baby food that comes either in jars or pouches and is given to infants or young children.
- Milk: Breast milk or infant formula is used as a primary source of nutrition for babies.
- Bottle warmers: Devices used to warm baby food and milk evenly and rapidly.
- Manual: A user guide that provides specific instructions for operating and maintaining a bottle warmer.
- Warming chamber: The main component where the baby food jars or milk bottles are placed for heating.
- Formula residue: The leftover traces of infant formula that can accumulate inside the bottle warmer.
- Milk residue: The leftover traces of milk that can build up within the bottle warmer.
- Food jars: Glass or plastic containers that store baby food securely and efficiently.
- Steam: The hot vapors produced by the bottle warmer facilitate the heating process.
Cleaning Specific Brands of Bottle Warmers
When it comes to cleaning specific brands of bottle warmers, I have some helpful tips to share for popular options like Philips Avent, Munchkin, and First Years Bottle Warmer. It’s essential to follow the manufacturer’s guidelines, but here are some general pointers on maintaining these specific brands.
For a Philips Avent Bottle Warmer, I begin by unplugging the unit and allowing it to cool down. I remove the water reservoir and wipe it clean with a soft, damp cloth. For the heating element, I use a descaler or mild white vinegar solution (1:3 ratio of vinegar to water), letting it sit for a few minutes before gently scrubbing away any mineral build-up. Finally, I rinse the warmer thoroughly with water and let it air dry completely before reassembling and using it again.
When cleaning a Munchkin Bottle Warmer, I first unplug the device and let it cool completely. I then remove and empty the water reservoir, wiping it with a soft, damp cloth. To clean the warming chamber, I use a white vinegar solution and a small brush to gently remove any mineral deposits. After that, I rinse the chamber with water and allow it to air dry before putting everything back together.
For the First Years Bottle Warmer, it’s essential for me to unplug the device and let it cool before proceeding. I remove the basket and wipe the interior with a damp cloth. If the warming chamber has mineral build-up, a white vinegar solution or descaling powder can be used to remove it. Using a soft brush, I gently scrub the chamber, getting into any crevices. I then thoroughly rinse the chamber with water and let it dry before reassembling the unit.
Using those guidelines, I find it simple to keep my Philips Avent, Munchkin, and First Years Bottle Warmers clean and functioning efficiently. Just remember to consult your specific model’s instructions and always unplug the device before starting the cleaning process.
Maintaining a Clean Bottle Warmer
To ensure the proper functioning and longevity of a bottle warmer, it’s important that I maintain its cleanliness. Regular cleaning not only keeps the exterior looking nice but also removes any buildup inside the warmer that could affect performance.
When it comes to cleaning the exterior, I simply use a damp cloth to wipe down the surface. This helps remove any spills or stains and maintains the appliance’s finish. It’s important to avoid using abrasive cleaners or harsh chemicals, which can damage the exterior of the bottle warmer.
For a deep clean, which I recommend doing every few weeks, I follow these steps:
- First, unplug the warmer and let it cool down completely to avoid any accidents.
- Remove any removable components from the warmer, such as baskets or trays, and wash them separately with warm soapy water. Rinse thoroughly and let them air dry.
- Next, I make a cleaning solution by mixing equal parts water and white vinegar. This helps to break down any residue or buildup that may be hiding inside the warmer.
- I pour the solution into the warmer’s reservoir, ensuring that it reaches the maximum fill line.
- I run a couple of warming cycles with the vinegar solution, making sure to empty the reservoir and refill it with fresh water for each cycle. This process sanitizes the interior by breaking down and flushing out any residue.
- Once the cycles are complete, I empty the reservoir and wipe down the interior with a clean, damp cloth.
By adhering to this cleaning process, I help maintain the efficiency of the bottle warmer and prevent any unpleasant odors or tastes in my baby’s bottles. Through regular maintenance and cleaning, I can ensure a longer-lasting and higher-performing appliance for my family’s needs.
Frequently Asked Questions
How do I descale a bottle warmer?
I recommend using a mixture of equal parts white vinegar and water to descale a bottle warmer. First, unplug the warmer and remove any visible residue. Fill the warmer’s reservoir with the vinegar solution and let it sit for about 30 minutes. After the soaking time, pour out the solution and scrub the interior components using a soft sponge or a brush. Rinse the parts thoroughly with clean water and allow them to dry before reassembling and use.
What is the proper method to clean a Dr. Brown’s bottle warmer?
To clean a Dr. Brown’s bottle warmer, first, unplug the device. Remove the water reservoir and wash it with mild soap and warm water. Rinse and dry it well. For the warming chamber, use a cloth dampened with a mild soap and water mixture to wipe it clean. Make sure to rinse the chamber thoroughly and let it air-dry before reassembling.
What are effective alternatives to vinegar for cleaning a bottle warmer?
If you prefer not to use vinegar, you can try cleaning your bottle warmer with lemon juice. Mix equal parts water and lemon juice and follow the same steps as you would with the vinegar solution. Another option is using a descaling solution specifically designed for baby bottle warmers, which should be available at your local baby store or online.
How can I clean a Baby Brezza bottle warmer?
For a Baby Brezza bottle warmer, first, unplug the unit and remove the water reservoir. Empty the reservoir and wash it with warm, soapy water. Rinse and dry it thoroughly. Wipe down the warming chamber with a damp cloth and mild soap, then rinse it well with clean water. Allow all parts to dry completely before reassembling and use.
Are there specific cleaning instructions for the First Years bottle warmer?
To clean a First Years bottle warmer, unplug the unit and remove any removable parts. Wash the removable parts with warm, soapy water and rinse thoroughly. Wipe down the warming chamber and other surfaces with a damp cloth and mild soap. Rinse the chamber well with clean water, and let all components air-dry before reassembling.
How often should I clean a bottle warmer to maintain hygiene?
It’s important to clean your bottle warmer regularly to keep it hygienic and maintain its efficiency. I recommend cleaning it at least once a week or more frequently if you notice any buildup or residue. If you’re using the warmer on a daily basis, consider descaling it every two weeks to remove mineral deposits.