Introduction to DIY Breast Milk Jewelry
Creating your own jewelry can be a rewarding and fun experience. But have you ever thought about making jewelry from breast milk? It might sound unusual, but it’s a growing trend among mothers who want to preserve the memories of their breastfeeding journey. In this blog post, we will explore the concept of DIY breast milk jewelry and how it can help you keep those precious memories close to your heart.
-
- Understanding the Concept of Breast Milk Jewelry
Breast milk jewelry is a unique type of keepsake that uses preserved breast milk to create beautiful pieces of jewelry. This can include necklaces, bracelets, rings, and even earrings. The process involves preserving the breast milk in a way that it can be used to create a stone or bead, which is then set into a piece of jewelry. This concept has gained popularity in recent years as a way for mothers to commemorate their breastfeeding journey and keep a piece of that special time with them always.
-
- Preserving Memories with Breast Milk Jewelry
For many mothers, breastfeeding is a significant part of their journey into motherhood. It’s a time of bonding and nurturing that is unique to each mother and baby. Breast milk jewelry allows mothers to preserve a small part of this time in a tangible way. Each piece of jewelry is not just an accessory, but a symbol of love, strength, and the special bond between mother and child. It’s a way to remember the late-night feedings, the quiet moments of bonding, and the incredible ability of your body to nourish your baby.
Whether you’re a new mom or have been on the motherhood journey for a while, creating DIY breast milk jewelry can be a meaningful way to celebrate and remember this special time. In the following sections, we will guide you through the process of creating your own breast milk jewelry, from choosing the right materials to overcoming common challenges. So, let’s dive in and start our DIY journey!
Why Choose DIY Breast Milk Jewelry?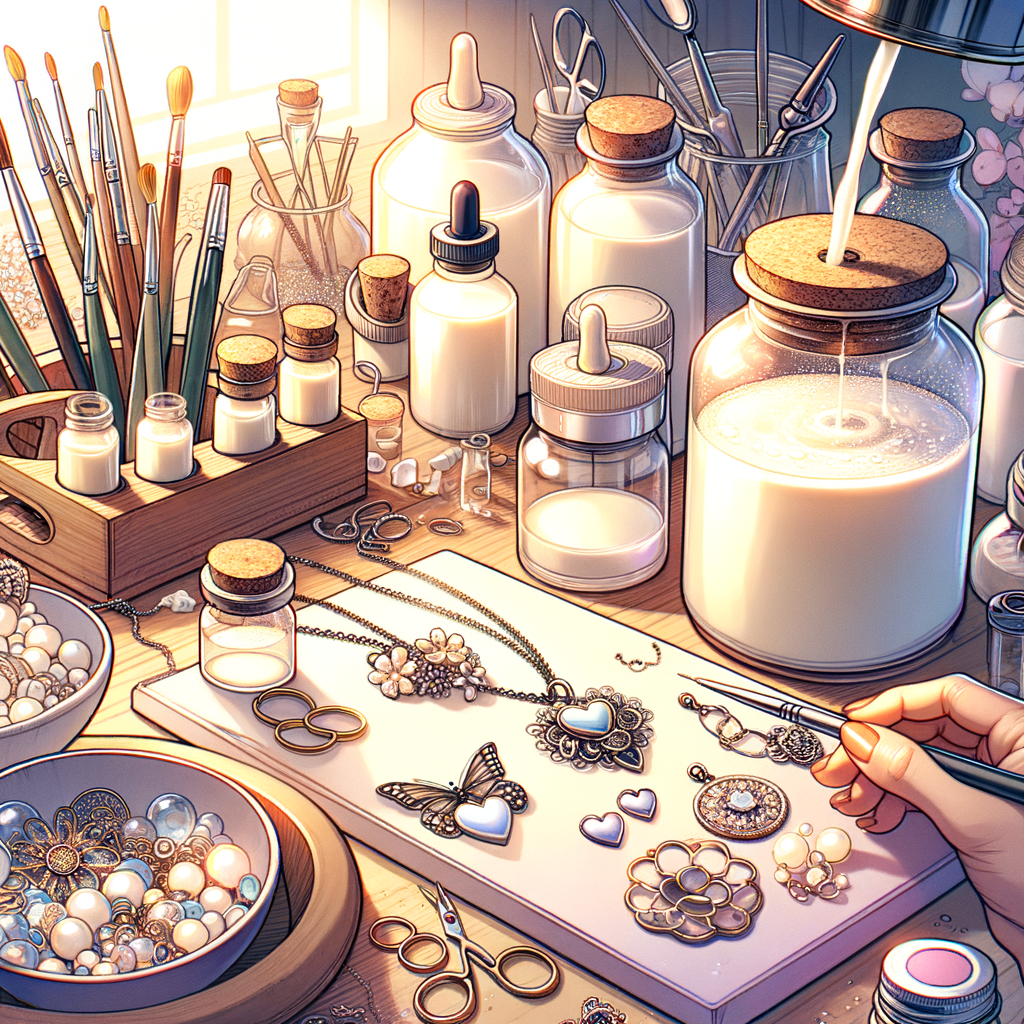
Choosing to create your own breast milk jewelry is a decision that comes with many benefits. Not only does it allow you to create a unique keepsake, but it also provides a cost-effective alternative to store-bought jewelry. Let’s explore these benefits in more detail.
- Personal touch in jewelry making: When you create your own breast milk jewelry, you have the opportunity to add a personal touch to each piece. You can choose the design, the materials, and the finishing touches that best reflect your personal style and the bond you share with your child. This level of customization is something you simply can’t find in store-bought jewelry. Jewelry design is an art, and when you are the artist, the result is a piece that is uniquely yours.
- Cost-effective compared to store-bought jewelry: Store-bought jewelry can be expensive, especially when it’s made from precious metals or includes gemstones. By choosing to create your own breast milk jewelry, you can save money while still creating a beautiful and meaningful piece. You have control over the materials used, allowing you to work within your budget.
- Creating a unique keepsake: Perhaps the most significant benefit of DIY breast milk jewelry is the opportunity to create a unique keepsake. This piece of jewelry will always serve as a reminder of the special time you shared with your child during breastfeeding. It’s a tangible memory that you can keep close to your heart, literally and figuratively.
In conclusion, DIY breast milk jewelry offers a personal, cost-effective, and memorable way to commemorate the bond between mother and child. It’s a project that requires time and effort, but the end result is a priceless keepsake that you can cherish for years to come.
Materials Needed for DIY Breast Milk Jewelry
Creating your own breast milk jewelry is a unique and meaningful way to commemorate the special bond between mother and child. However, before you start, it’s important to gather all the necessary materials. Here’s a list of what you’ll need:
Collection of Breast Milk
The first thing you’ll need is breast milk. This is the key ingredient in your jewelry. You don’t need a lot, just a few ounces will do. Remember, the milk will be preserved and turned into a solid form, so it won’t look like liquid in the final product.
Preservation Materials
Next, you’ll need materials to preserve the breast milk. This usually involves a preservation powder that turns the milk into a solid. You can find breast milk preservation kits online, which include detailed instructions on how to use them. It’s important to follow these instructions carefully to ensure the milk is properly preserved.
Jewelry Making Supplies
Finally, you’ll need supplies to turn your preserved breast milk into jewelry. This includes a jewelry mold, which you can find in a variety of shapes and sizes, and jewelry resin. You’ll also need a necklace chain or bracelet cord, depending on what type of jewelry you’re making. Additionally, you may want to consider adding other elements to your jewelry, like glitter or small charms, to make it even more personalized.
Once you have all these materials, you’re ready to start making your DIY breast milk jewelry. Remember, the process takes time and patience, but the end result is a beautiful, one-of-a-kind piece of jewelry that holds a special meaning.
Steps to Make Breast Milk Jewelry
Step 1: Collecting and Preparing the Breast Milk
Making breast milk jewelry starts with the collection and preparation of the breast milk. This step is crucial as it ensures that the milk is safe and ready for the jewelry-making process.
-
- How to safely collect breast milk
Collecting breast milk for jewelry-making is similar to the process of pumping for feeding. Ensure your hands and the pump are clean to prevent contamination. After pumping, store the milk in a clean, airtight container. It’s important to note that you don’t need a large amount of milk for this process; a few ounces will suffice.
-
- Preparation process for the breast milk
Once you’ve collected the milk, the next step is to prepare it for preservation. This involves heating the milk to kill any bacteria and allow it to solidify. Pour the milk into a pan and heat it on low heat, stirring constantly to prevent it from burning. Once it has reached a creamy consistency, remove it from the heat and let it cool.
Remember, the key to successful breast milk jewelry is in the preparation. Taking the time to properly collect and prepare the milk will ensure a beautiful and meaningful piece of jewelry.
Step 2: Preserving the Breast Milk
Once you’ve successfully collected and prepared your breast milk, the next crucial step is preserving it. This step is essential to ensure the longevity and quality of your DIY breast milk jewelry. Let’s delve into the methods and best practices for preserving breast milk.
-
- Methods for breast milk preservation
There are several methods to preserve breast milk, each with its own advantages. The most common methods include:
-
-
- Freezing: This is the most common method. It involves storing the milk in airtight containers and placing them in the freezer. This method can preserve the milk for up to 6 months.
- Refrigeration: If you plan to use the milk within a few days, refrigeration is a good option. It can keep the milk fresh for up to 5 days.
- Dehydrating: This method involves removing all the water from the milk, leaving behind a powder that can be rehydrated when needed. This method can preserve the milk indefinitely if stored properly.
- Do’s and Don’ts in breast milk preservation
-
Preserving breast milk requires careful handling to maintain its quality. Here are some do’s and don’ts to keep in mind:
| Do’s | Don’ts |
|---|---|
| Do label your containers with the date of collection. | Don’t store breast milk in the door of the fridge or freezer where temperatures fluctuate. |
| Do use airtight containers for storage. | Don’t refreeze thawed milk. |
| Do thaw frozen milk in the refrigerator or in a bowl of warm water. | Don’t microwave breast milk as it can destroy nutrients and create hot spots that can burn your baby. |
Preserving your breast milk properly is a crucial step in creating your DIY breast milk jewelry. By following these methods and tips, you can ensure that your milk is preserved in the best possible way, ready to be transformed into a beautiful piece of jewelry.
Step 3: Creating the Jewelry Piece
After you have successfully collected and preserved your breast milk, the next step is to create your unique piece of jewelry. This process involves two main parts: choosing the right design and assembling the jewelry piece.
-
- Choosing the Right Jewelry Design
Choosing the right design for your breast milk jewelry is a personal decision. It’s important to choose a design that resonates with you and reflects your personal style. You can opt for a simple pendant, a charm for a bracelet, or even a ring. There are numerous designs available online, or you can sketch your own. Remember, this piece of jewelry is a keepsake that symbolizes a special time in your life, so choose a design that you will cherish.
-
- Assembling the Jewelry Piece
Once you have chosen your design, the next step is to assemble your jewelry piece. This involves placing the preserved breast milk into the chosen setting. You will need to handle the preserved milk carefully to avoid damaging it. Once the milk is in place, you will need to seal the setting to protect the milk. This can be done using a special resin or a clear sealant. After the sealant has dried, your breast milk jewelry is ready to wear or display.
Creating your own breast milk jewelry can be a rewarding experience. Not only do you end up with a unique piece of jewelry, but you also have the satisfaction of knowing that you made it yourself. Remember, the key to successful DIY breast milk jewelry is patience and careful handling of the materials.
Common Challenges in DIY Breast Milk Jewelry Making
Making your own breast milk jewelry can be a rewarding experience, but it also comes with its own set of challenges. Here are some of the most common ones:
Preservation Issues
One of the biggest challenges in making breast milk jewelry is preserving the milk. Breast milk is a perishable substance and if not handled properly, it can spoil and ruin your jewelry piece. It’s important to use a preservation powder or method that will keep the milk in a solid and stable form. This process can be tricky and requires careful attention to detail.
Designing the Jewelry
Designing jewelry, especially for beginners, can be a daunting task. It requires a good eye for detail and a sense of creativity. Choosing the right materials, colors, and shapes that will complement the breast milk stone is crucial. You also need to consider the durability of the materials you choose, as the jewelry will hold a precious memento.
Assembling the Jewelry
Assembling the jewelry is another common challenge. This involves setting the breast milk stone into the jewelry piece, which requires precision and patience. It’s important to ensure that the stone is securely set to prevent it from falling out and getting lost. This process can be difficult, especially if you’re not familiar with jewelry making techniques.
Despite these challenges, don’t be discouraged. With practice and patience, you can create a beautiful piece of jewelry that holds a special memory. Remember, the value of your breast milk jewelry is not in its perfection, but in the love and effort you put into making it.
How to Overcome These Challenges
Creating DIY breast milk jewelry can be a rewarding experience, but it does come with its own set of challenges. However, with the right knowledge and techniques, you can easily overcome these obstacles. Let’s look at some of the best practices in breast milk preservation and tips for designing and assembling the jewelry.
- Best Practices in Breast Milk Preservation
Preserving breast milk for jewelry making requires careful handling. Here are some tips to ensure the best results:
- Proper Storage: Store the breast milk in a clean, airtight container. This helps to maintain its quality and prevent contamination. You can refrigerate it for up to 5 days or freeze it for longer storage.
- Preservation Process: To preserve the breast milk for jewelry making, you need to remove the water content. This can be done by heating it slowly on a low heat until it turns into a solid form. Be careful not to burn it. You can then grind it into a powder form for use in the jewelry.
- Sanitization: Always sanitize your tools and work area before starting the preservation process. This helps to prevent bacteria and other contaminants from affecting the quality of the breast milk.
- Tips for Designing and Assembling the Jewelry
Designing and assembling the jewelry can be a fun and creative process. Here are some tips to help you:
- Design: Start with a simple design, especially if you’re a beginner. Sketch out your design on paper first before starting on the actual piece. This helps to visualize the final product and make any necessary adjustments.
- Materials: Choose high-quality materials for your jewelry. This not only enhances the appearance of the piece but also ensures its durability. You can use metals like silver or gold, and other materials like resin to encase the breast milk.
- Assembly: Assemble the jewelry carefully to avoid damaging the breast milk. Use appropriate tools and follow the instructions provided in your DIY kit. If you’re unsure about any step, don’t hesitate to seek help or do further research.
Overcoming the challenges in DIY breast milk jewelry making requires patience and practice. But with these tips, you can create beautiful and meaningful pieces that will last a lifetime.
Conclusion: The Joy of Homemade Breast Milk Jewelry
As we conclude our journey into the world of DIY breast milk jewelry, it’s time to reflect on the process and appreciate the sentimental value of these unique keepsakes.
-
- Reflection on the process
Creating your own breast milk jewelry isn’t just about the end product. It’s about the journey, the learning, and the personal growth that comes with it. It’s about the hours spent researching, gathering materials, and meticulously crafting each piece. It’s about the patience and perseverance required when things don’t go as planned. And most importantly, it’s about the joy and satisfaction that comes from creating something beautiful and meaningful with your own two hands.
-
- The sentimental value of DIY keepsake jewelry
DIY breast milk jewelry is more than just a piece of ornament. It’s a tangible reminder of the bond between a mother and her child. It’s a symbol of the love, care, and nourishment that a mother provides. Each piece of jewelry carries a story, a memory, and a piece of the heart. And that’s what makes them so special and priceless.
So, whether you’re a new mom looking for a unique way to commemorate your breastfeeding journey, or a seasoned DIY enthusiast looking for a new challenge, making your own breast milk jewelry can be a rewarding and fulfilling experience. And remember, the value of these keepsakes isn’t measured in dollars and cents, but in the love and memories they represent.
Thank you for joining us on this journey. We hope you found this guide informative and inspiring. Happy crafting!